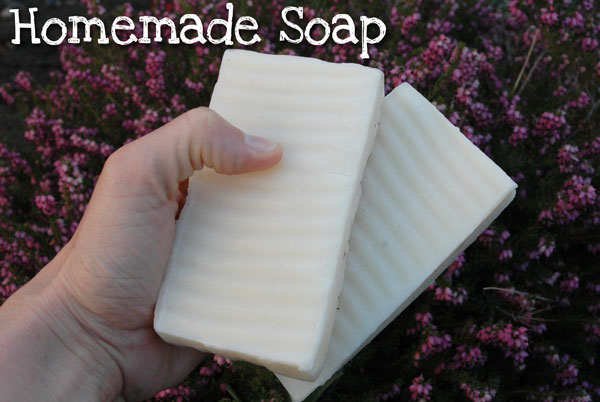
This episode of Happy Homesteading is all about making homemade soap!
This one took a whole lot of research to figure out. I read and learned how they used to make it during the 1800’s. And then I talked to a local soap making artisan and asked her for some advice on best places to order products. This was by far one of the most interesting projects I have done thus far, and it was a lot easier than I thought it would be, although somewhat dangerous.
History
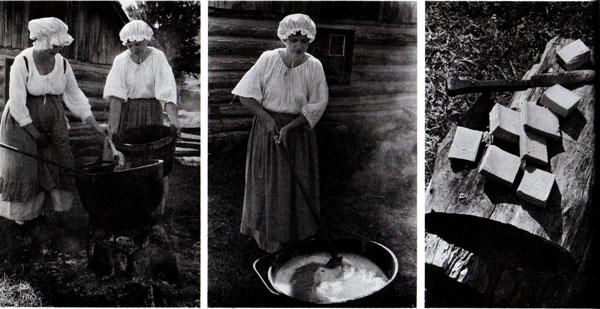
Soap made from scratch consists of 2 main ingredients. Animal fat (tallow or lard) and lye. They would make tallow by slow cooking beef fat for 3-4 hours on low, remove any cooked meat bits and strain it. Then let it cool and you have homemade tallow. I do plan on making some of this soon.
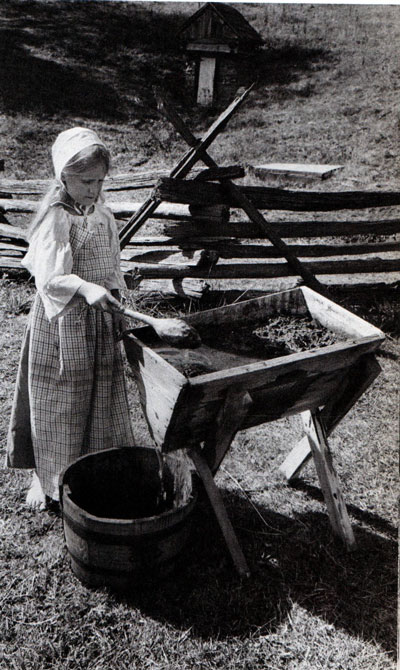
Homemade lye is made from wood ashes. There is a process of basically using straw, pouring the ashes over the top in a barrel, then pouring water over them. After a few days the liquid is lye. I would love to try to make homemade lye myself too. I am just a little bit nervous though since I have kids around and this stuff can burn skin. But they usually had kids around too back in the olden days. If they can do it so can I.
Images are from childrens book: Pioneer Children of Appalchia
Making Homemade Soap for the first time
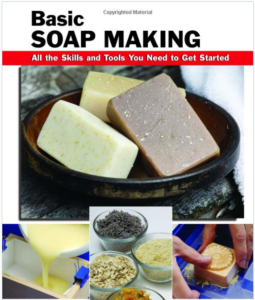
After talking to a local soap artisan about how to get started making soap, she recommended this kindle book called Basic Soap Making – you can download it on Amazon. At that time this ebook was FREE but now it’s up to $10.99. I downloaded it to my Android phone and read the whole thing in less than an hour. It’s a great book with LOTS of pictures to help you when you are getting started. I am a visual person so I love all the pictures. There are some recipes and ideas to make all kinds of interesting bars as well. Definitely worth reading if you want to make soap.
I followed the directions to make the Basic 4 Oil Soap recipe in this book and I think it turned out really well. Just remember to follow the directions and safety protocols when using lye. It is a chemical and I read through a few horror stories while doing my research of kids grabbing the lye water mixture and burning themselves badly. Not worth that little bar of homemade soap for a blind kid..just keep that in mind. I decided to do my recipe when all the kids were gone to school for the day.
INGREDIENTS:
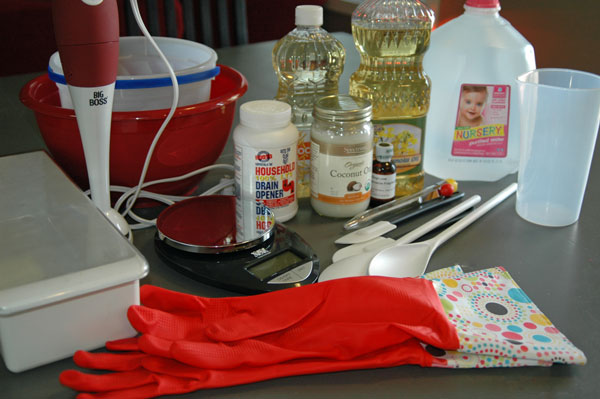
Supplies:
- rubber gloves
- digital scale
- mold of some sort
- plastic mixing bowls
- thermometer
- immersion blender
- freezer paper
Ingredients for 4-oil soap recipe from Basic Soap Making book
- 4 ounces coconut oil (solid)
- 3 ounces canola oil
- 4 ounces olive oil
- 4 ounces safflower oil
- 2 ounces lye
- 5 ounces distilled water
You need quite a lot of supplies to safely make homemade soap. I found a nice little strange egg container at a thrift store with a lid that I knew would be perfect shape for making soap, and it only costed me $3.00.
DIRECTIONS
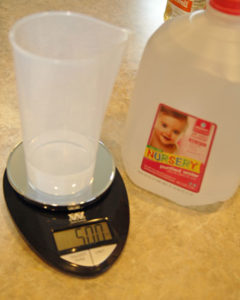
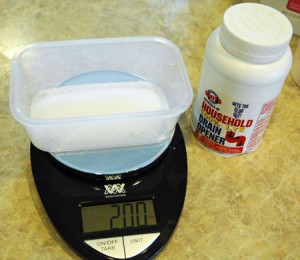
First thing I did was to tare the digital scale and measure out distilled water in a plastic dish.
Next I measured the dry lye crystals in a plastic dish.
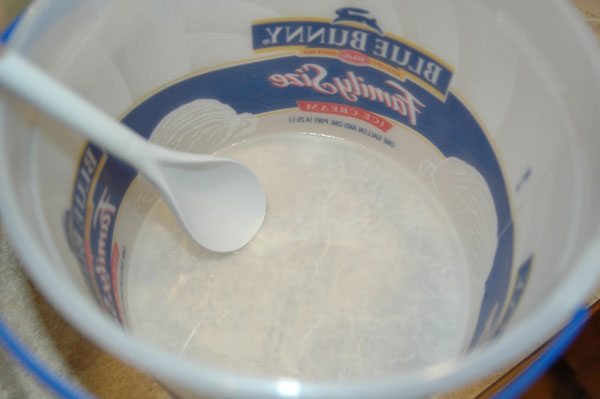
I then added the WATER first to an old plastic ice cream bucket. Then I slowly added in the lye crystals. Note: NEVER pour water into the lye, always add lye crystals to water. Oh and make sure you don’t splash.
The lye and water got REALLY HOT, it was a chemical reaction. I noticed some steam and horrible smelling vapors, so I opened the window.
I started stirring the lye & water mixture gently until the lye crystals were dissolved. Then I set it aside to cool (we want it to cool to around 100 degrees).
Next was measuring out the oils.
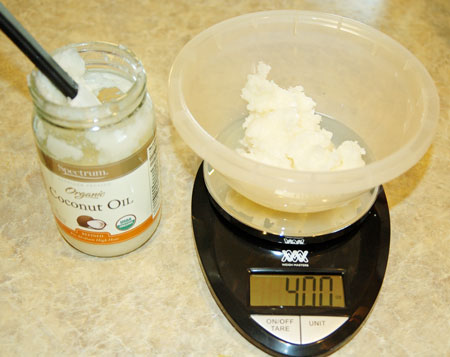
I placed a plastic bowl on the scale, tared it to say zero and started adding in the coconut oil. If I added to much I would take some away until it said 4 oz. Then I melted it in the microwave.
I did this with all the other oils as well. Measuring them out with the scale. You have to be really exact with soap making.
Next I gently mixed all the oils together into a bowl. Then once the lye solution cooled to 100 degrees I added in the lye/water mixture, being careful not to splash. I used my spatula to gently stir the mixtures together for a minute until it became slightly opaque.
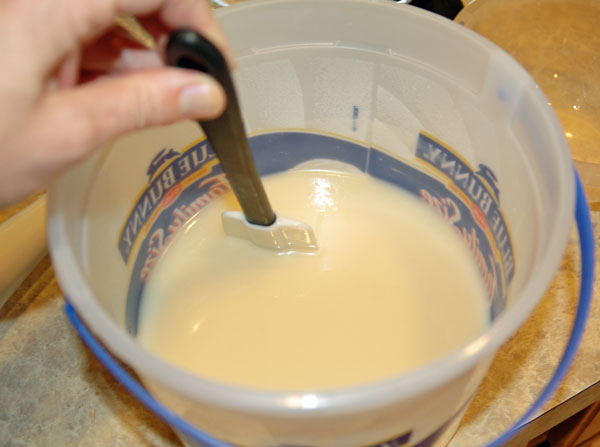
Then I took out my immersion blender and started blending being careful not to splash, and keeping the blades near the bottom of the mixture. I did this for around 2 minutes maybe…not really sure. And I didn’t have any of my photographers (aka kids) to take my pictures this time because I wanted to make this when they weren’t home. So no pictures of me using the immersion blender for now. When it started getting nice and thick I turned off the immersion blender and mixed by hand until it reached trace.
Since this was my first time trying to reach TRACE I wan’t exactly sure what it was. Its when the soap mixture is ready to pour into molds. You can tell its reached trace when the soap mixture falls from your spatula leaving a trail of soap on the surface of the mixture for a few seconds before it disappears into the mixture.
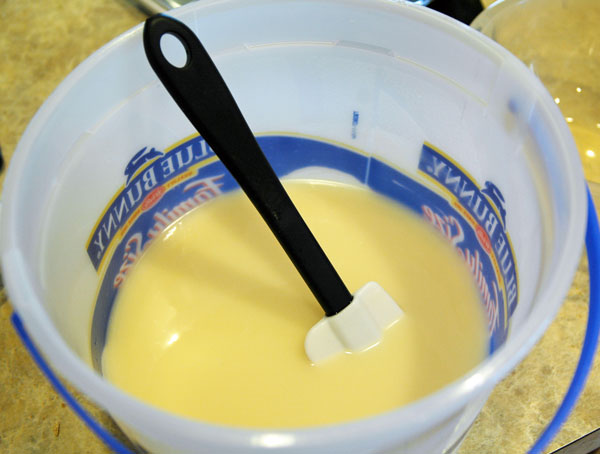
I then poured the mixture into my plastic mold. I didn’t add a freezer paper liner since my container is made of plastic and I heard that it would just pop right out when dry. I put the lid on, covered it up with two towels, let it rest to complete its saponification process for 24 hours.
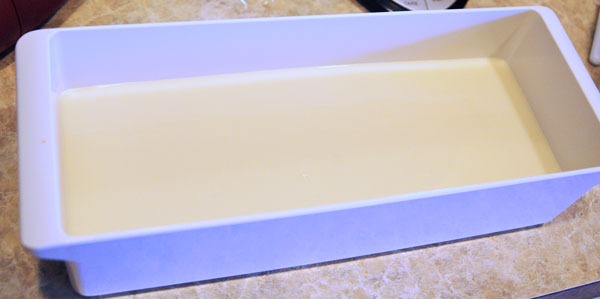
PS – you have to wait for 24 hours to clean all your tools too, so just leave your tools out to dry. After 24 hours my soap looked great! The only problem was that I should have used a freezer paper liner, because it did not want to just pop out of my plastic container.
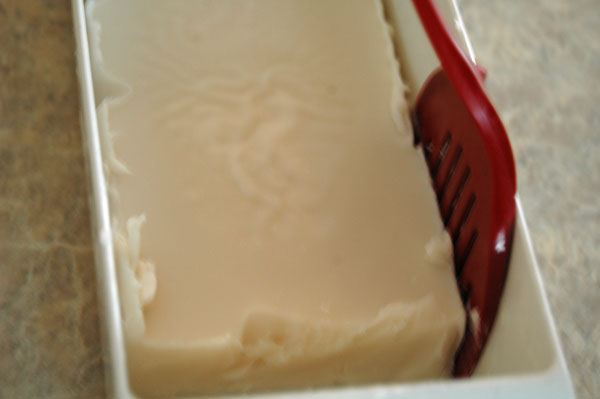
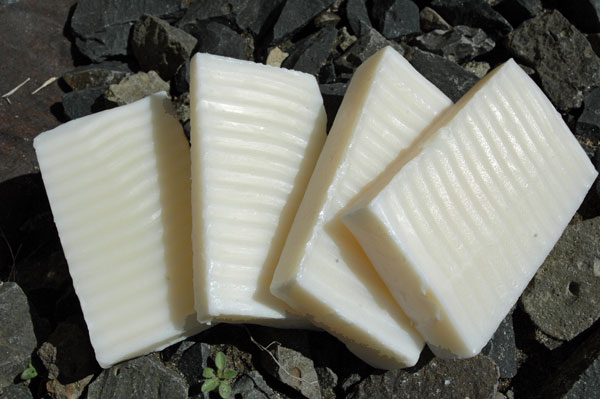
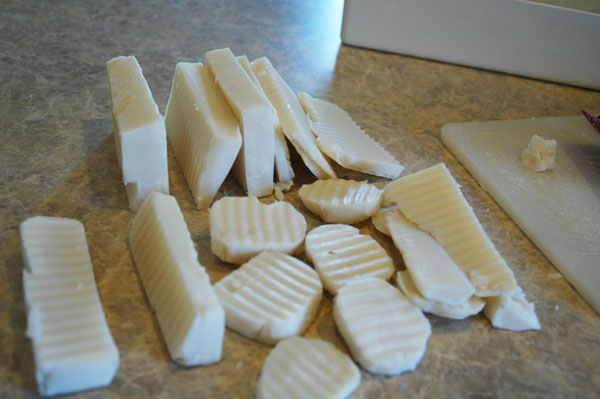
I had the worst time trying to get it out of the container and instead had to take it out in strange shards. I was really sad about it, hoping for beautiful square bars. Some I just rolled into a ball and cut into rounds. I then cut what I could using my pampered chef waffle cutter. Here are all the strange pieces I was able to get out of it.
And lastly, you have to dry your soap for awhile. It’s best to cure it for about a month or even 6 weeks. The longer you air dry it the longer it will last when you use it.
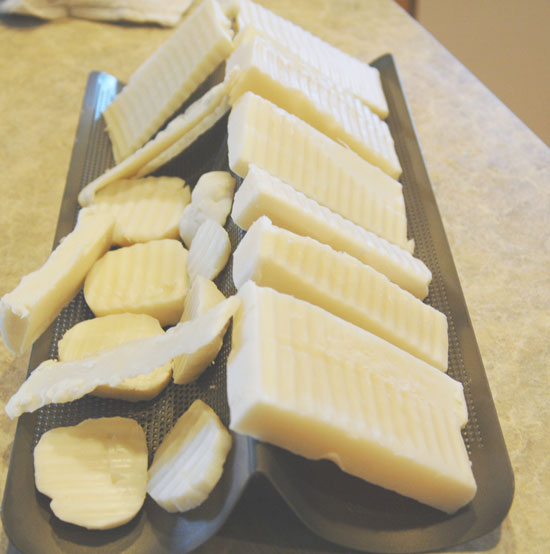
It’s been a month now and my bars of soap have dried.
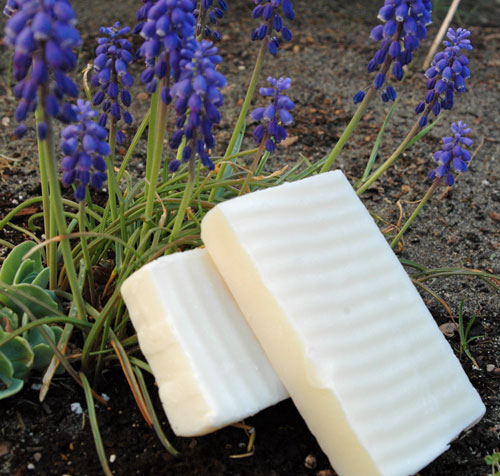
This recipe works really well, it lathers great and has no fragrance. It’s a really nice clean soap. I rather enjoyed making soap for the first time, and will be making more for the fun of it.
WORTH THE COST FOR THIS RECIPE? NO – if you are an Ivory soap user. Ivory soap cost’s less to buy at Walmart than making it yourself. But if you like the more artisan or fancy brands of soap than this recipe is more cost effective. Later on I will be making a tallow/homemade lye recipe and will be doing a cost comparison on that one which I think will be more cost effective – stay tuned.
WORTH THE TIME? NO, but it was fun to make! Making homemade soap takes time, there is risk involved when working with lye, and then you have to let it cure for a month or longer. So buying the store bought Ivory soap is a quick affordable easier option. But I still had a blast making it…and will be making more for fun.
Price Breakdown (note: I ended up making a double batch because my container was big):
Lye ( found at Ace Hardware) $3.99/16 oz. = $0.99/4 oz used
4 ounces coconut oil (solid) ($4.99/14 oz) = $2.85 for 8 oz.
3 ounces canola oil ($2.24/48 oz.) = $0.28 for 6 oz.
4 ounces olive oil ($2.99/16 oz.) = $1.50 for 8 oz.
4 ounces safflower oil ($3.98/32 oz) = $1.00 for 8oz.
5 ounces distilled water ($1.00/gal) = $0.07 for 10 oz.
Final cost: $6.69/ 2.2 lbs. 2.2 lbs of soap = 35.2 oz.
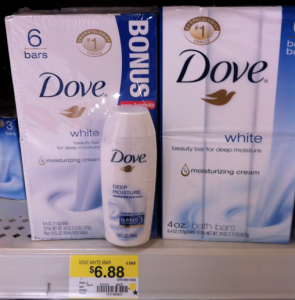
Lets compare this homemade soap recipe to a 6 pack of Dove soap which costs $6.88 for a 6 pack at Walmart. Each bar is 4 oz. To get 32 oz. like in my homemade recipe it would cost around $9.17 worth of Dove soap.
Ivory soap is one of the least expensive brand of bar soap, so I wanted to compare them as well. A 3-pack of Ivory soap is $1.27 at Walmart. To get 32 oz. like in my homemade recipe it would cost around $6.45 for 32 oz. Ivory soap is a teeny bit less expensive than making soap yourself at home.
Final thoughts on making my own Homemade soap. I like that I know all the ingredients that went into making my own soap, and it was a really fun project! But it was a little bit stressful and dangerous. I could have burned myself with lye, so there is risk involved. I like that I learned how to make it and am really excited to try other recipes too. I think science is fun!
Stay tuned for me making homemade soap with homemade tallow and homemade lye in the future. 🙂 I’m guessing this will be even more cost effective, but who knows!


Comments & Reviews
Nancy says
I use a quart canning jar to mix the water and lye. I measure the water (6 oz.) into the jar, measure the lye, take them outside, pour the lye into the jar and, holding onto the jar threads and to top, swirl the solution around until the lye has dissolved. Then, I leave the jar outside in the back yard to cool. Kids and pet stay at the other end of the house until I give the all clear.
Karrie says
Great idea Nancy!
Sandy says
I am a soap maker too. I have found that a little jojoba oil will help it pop out of the mold. You need a oil that does not saponify. Just remember to not EVER use anything aluminum! It causes a poisonous gas. The first time I made soap I used a big aluminum pot. Smoke came billowing out of the pot as soon as I added the lye water. It scared the heck of me! I quickly took it outside. It was the middle of January so I had to run around opening windows, it was also 2am. I almost poisoned my babies in their beds! It took me a few years to get up the nerve to try again. I am glad I did. I love it! Safety is first so make sure you have goggles and vinegar in case there is a spill or splash. The vinegar will neutralize the lye. You can use so many different oils and each one does something different to the soap. Coconut oil gives it lather yet it can be drying if too much is used. You will have to do your own homework to make your own perfect soap. Enjoy!!!
Jessica says
I make my own soap and my favorite part is that it is not tested on animals : )
Carin says
It is so great to be able to make your own soap and someday I would like to try. Until then we only use KIRK Original Coco Castile soap. They have been making soap since 1839 and there is no animal by products, no synthetic detergents, like sodium lauryl sulfate. Made with all natural coconut oil. This is the ONLY soap my daughter can use since she has allergies, asthma and eczema. personally I love it, the best soap I have ever used. Keep sharing all your ideas.
Becky says
I used to make my own soap since I worked less hours and it definitely is so much better for your skin. I refuse to buy the beauty bars and prefer to give my business to local home soap makers. It’s an interesting skill to learn. I highly recommend trying your own lotion & balm. Thanks for the information 🙂
Happy.MoneySaver says
Thanks! I am glad you liked it! I have tried my own lip balm and I love it!
Jan Hebert says
This was a fun post – I make soap but use the crockpot method – I’m impatient and don’t want to wait to use my soap! I also like the rustic look that you get in hot-process soap. I hope you don’t mind my mentioning Chickens in the Road blog – Suzanne has an awesome tutorial for hot-process using a crockpot. Someone above asked if the soap is drying or moisturizing – it’s not drying at all, since the glycerine is still in your product – it’s stripped out of commercial soaps and then they add chemicals to replace the glycerine! Here is a link to Chickens in the Road: http://chickensintheroad.com/house/crafts/hot-process-soap-in-a-crock-pot/
Jan
Debbie says
This is the post that got me making hot process soap!
Mary B. says
First of all I love your posts! My teen men won’t use a bar of soap they use body wash. Is there a way to use this recipe to make body wash? I would rather make healthier version for them vs. the product on the shelves.
Rachel H in Seattle says
You made a couple of apples = oranges comparisons.
Dove is NOT soap, it’s mostly detergent . . . Crap I don’t want in my body.
Ingredients: (from Dove.us)
Sodium Lauroyl Isethionate, Stearic Acid, Sodium Tallowate or Sodium Palmitate, Lauric Acid, Sodium Isethionate, Water, Sodium Stearate, Cocamidopropyl Betaine, Sodium Cocoate or Sodium Palm Kernelate, Fragrance, Sodium Chloride, Tetrasodium EDTA, Tetrasodium Etidronate, Titanium Dioxide (CI 77891).
Ivory is soap, but has had all of the naturally occurring glycerine stripped out, and lots of air whipped in.
So after the benefit analysis (garbage in body / NOT), the cost analysis must include the lotions used to correct the problems caused by using the garbage on my body.
Handmade soap, or even better store bought soap is worth every dime.
(The glycerine is stripped out of cheap soap and sold separately. The resultant “soap” is basically the waste product of glycerine production. Probably started during war.)
That’s why I make soap, and my thinking process. YMMV.
Nice post, tho. You do good. ;o)
Bridget says
Just wondering…
How did this soap compare to Dove or Ivory? Was it moisturizing? Drying?
slywlf says
Thank you so much – this was the first tutorial on soap making I have found that is completely clear and easy to follow! Since I am going for a homesteading lifestyle with my upcoming move I was hoping to start doing soap making as part of my new life. So many sites over-complicate the instructions and/or have poor if any visuals. Yours hits just the right balance of text and pictures. Now I feel I can do it 😉
Anna says
I’ve been making and teaching soap making for years. If you buy your supplies from a different source, they will be less expensive. But the real secret to getting the soap to pop out of the plastic is to freeze it for a bit—then whack or twist it, and it will pop right out. I use lengths of PVC pipe to mold mine—I freeze it, then whack it on the counter and it falls out. I like the shape–nice, round little cakes.
Incidentally, every guy I know steals my soap for shaving. It s the BOMB. And if you make it in the PVC tubes, it fits really well into a shaving mug.
Mary Infante says
Just a quick note about the lye, I have been told that you should keep a small spray bottle of vinegar beside you when working with lye. Should you splash lye on your skin, quickly spritz the spot with the vinegar to stop the burn. I’ve never tried this, but the lady I got the information from makes soap for her family all the time.
Hope this helps!!
Jess says
Oh the things you can learn from “Fight Club”. 🙂
Great post! Thanks!
Czarina says
Just rinsing a lye spot on your skin with vinegar is very risky – yes it will neutralize the lye but the reaction also causes a little heat. On top of that, if the lye solution was strong or left long enough to already irritate your skin the vinegar will also feel very painful (personal experience from when I thought I was more than careful enough to go without gloves. ouch!)
I recommend flushing the exposed skin in water first, and then spritz with the vinegar.
Stacy says
I make soap, too. While it does cost a little more to make versus buy in the store, the soap products you buy in the store are not good for your skin.
I made the same mistake by not lining my pan the first time I made soap. lol
Karrie says
Ha Stacy, so glad I am not alone! 🙂 I am really wanting to make more soap, just finished up my last homemade bar. I loved it!
D says
I cannot recommend making homemade lye. It’s very difficult to assess the strength of the lye water you produce and thus very difficult to avoid having soap that is “lye-heavy” and harsh (or worse, that will actually give you chemical burns even after it is made.) There’s a reason why old-fashioned soap has the reputation for being hard on your skin, and this is it. It’s critically important to have the correct amount of lye for the amount of oils/fats you are using.
Homemade tallow is easy and relatively safe (just the usual cautions for working with hot oil apply)
Paula says
I am thinking of making some soap because of my skin issues. Out of curiosity, How long did your bars last?
Karrie says
They can last forever! 🙂
Valerie says
There is nothing like home made soap. The possibilities are endless as far as color, texture, scents, and oils you use. Be sure to run any recipe you plan to use through a lye calculator to make sure you get the right outcome. You can find many lye calculators on the web. You can use almost anything for a mold. A little spray oil goes a long way on getting your soap out of the molds too. Also, keep vinegar nearby at all times while making the soap. The vinegar will neutralize any splashes of lye within seconds, and definitely wear protective eye wear. You don’t have to limit yourself to using stainless steel utensils. I use a porcelain covered pot to heat the oils in and then to stir the soap. I use plastic for everything else. I have never made laundry soap, but want to, so I look forward to your posts on that adventure.
Lara says
Hi there! Would u mind sharing the amounts/ratios of oatmeal and essential oils???? Thanks SO much! Larascakes at gmail dot com!
Susan says
You need to use Stainless Steel Spoons and Bowls.Also if you line you Mold with Freezer Paper Your Soap will come out alot easier. You can use Essential Oils for Scent and add such things as Ground up Oatmeal.
Lara says
Oops! I meant that as a reply to Susan!
Deborah says
Nice article! Did you know that you could have saved a bunch of time making your homemade soap using a method called hot processing in a crock pot? It takes about 1 hour, and you have ready to use soap. If you want more information, let me know. I can give you a link to a class and recipe to use.
Debbie Underfinger says
I am interested in this method! Thank you!
carol says
I make mine in my crock pot, easy and very quick. I do, however, let mine air dry for a week or two
after unmolding to harden, it will last much longer
Alisa says
FYI: EVERYTHING is a chemical. Human beings are walking chemical reactions, and when someone has something wrong with him/her, it is because at least one chemical reaction is either not taking place that is supposed to, or it is not taking place enough, or it is taking place incorrectly (that at least goes for genetic disorders). Water is a chemical too. It’s chemical formula is H2O (not sure if there is a way to do sub numbers on this, but the 2 is a sub2). Anyways, just wanted to make a point. Lye is Sodium hydroxide. Its chemical formula is NaOH. EVERYTYHING is a chemical. Lye just happens to be a strong base, which is why it will burn your skin if you touch it and don’t wash it off. And the people who think real soap is bad because it is made with lye have absolutely no understanding of chemistry whatsoever! The NaOH reacts with the fats and makes glycerin. So after the reaction is done taking place, there is no more NaOH, just glycerin and a little bit of fat. Anyways, cool post. I make my own soap too, but I do buy a little just in case I run out of my homemade stuff and didn’t make more in time. I didn’t know you could get lye at ACE. I got mine at Lowes in the plumbing section. I’ve also heard that you can get a big thing of it at Cash and Carry, but you have to ask for it and show your picture ID because some people use it to make some drug (can’t remember if it’s meth or what). I wonder which place is cheapest to get it. Hmm.
Karrie says
Oooh, very cool! I bought 2 of the lye 1 lb. containers, not sure of how much I would need. But since I am just trying to learn and experiment a bit I think I better not buy the giant one from cash n carry right now. ha ha! But if I ever start a business I will have to look into that, thanks for the tip.
Alisa says
No problem. Also, thanks for letting us know you used your Pampered Chef Waffle cutter. I want one now! Also, for molds, silicone molds work really nicely because you can just pop them out. Also, I like to use empty Pringles cans or even the paper frozen juice containers because you can just cut through them after the soap has set and then you just push the soap out and then you just throw the mold away (after all, it was going to go in the trash anyways, you might as well get some use out of it!).
Shelley says
And doing anything in life comes with a risk – here are 2 examples: 1. there are people who have died while putting their underwear on in the morning (tripped, fell, banged their head on something and died)…2. going to the store to buy your soap, you could get into a car accident or get run over if you’re not in a car, etc, – so while yes, lye can be dangerous if not handled correctly, if you take sensible precautions (ie keep children and pets out of the area while you are working with it, wear eye protection and gloves, follow the manufacturers instructions, and make sure that you allow the soap to cure for the correct length of time (if in doubt, leave it for longer to be certain), then it’s no more risky than many other things you do on a daily basis and no longer think of as dangerous.
sharon says
I went to a chemical company and bought sodium hydroxide for about $1.50/lb. I bought a 50# bag and will never have to buy it again. I keep it wrapped in an airtight bucket and have a smaller container to work from when soaping.
Larger quantities are always cheaper but sometimes you have to consider shipping costs.
Adding scents jacks up the price considerably but homemade soap lasts way longer than store bought so it ends up cheaper in the long run.
Comet says
Fascinating. I wonder if you can make soap from other animal fat… like chicken, hmm?
Karrie says
I am pretty sure you can make soap from any kind of fat. 🙂
Jennifer says
Hello!! You should use harder animal fats like beef suet when making soap chicken fat leaves your bar rather slimy, loose, and softer.
Jyl Lytle says
Vegetable oil won’t saponify properly. That’s the only kind of fat that I know won’t work. It was the first one I tried at home. 🙂 It was a total waste.
Rachel says
So glad I can live vicariously through your experiances! LOL. Thanks again Karrie. I’ve enjoyed reading these.
Karrie says
Ha ha, you are welcome! I am so enjoying myself…LOL