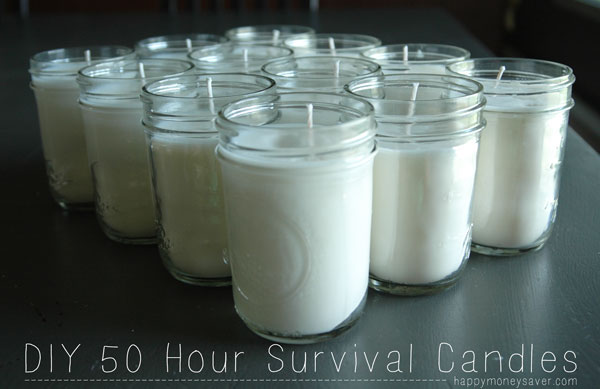
Save money and be prepared by having these 50 Hour Soy Survival Candles on hand. I have seen stores charge a lot of money for survival long-burning candles, but you can make your own for less than $2.00 per jar and it is so easy to do!
I swear I am reaping so many benefits from doing this Happy Homesteading series of posts, as I get to learn these new skills and find out to to survive on my own a little bit more. Plus doing these projects are so much FUN!
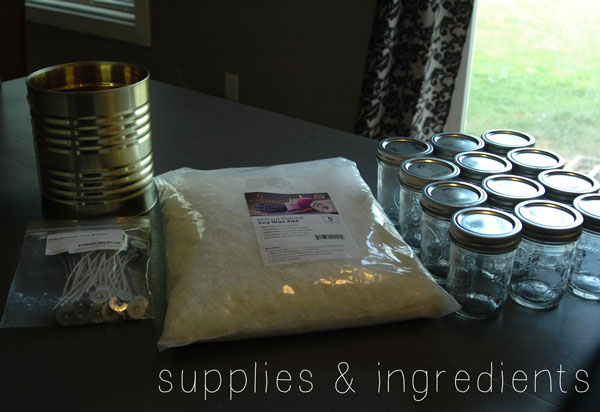
All you need are some half pint glass canning jars, a 5 lb. bag of soy wax, some wicks, aluminum foil and a #10 can.
WAX: I found that the most cost effective price for soy wax was on amazon : The Milliard Wax 5 lb. bag is $12.99 plus free shipping if you have amazon prime. I checked my local craft stores and unless you have a coupon this is still a better deal. I used soy wax because it is all natural, renewable, non toxic, burns clean, helps support the American farmer and has a longer burn time than many other types of paraffin waxes.
WICKS: I ordered these Candlescience 6 inch Soy wax coated candle wicks for $8.99 (50 pack). I think you might be able to also find a smaller pack of 6 inch wicks at your local craft stores for less, but since I get free shipping with Amazon prime, I love ordering my items online, saving a trip.
GLASS JARS: The 5 lbs of soy wax will fill 13 half-pint sized glass canning jars. You can buy these half-pint jars online at Amazon, or at your local Walmart/Target store for around $8-$12 a case. Also keep your eyes out on craigslist or yard sales for canning jars. Luckily I had a box of unused jars sitting in my garage from a time when I was going to make some jam and didn’t (ahem.)
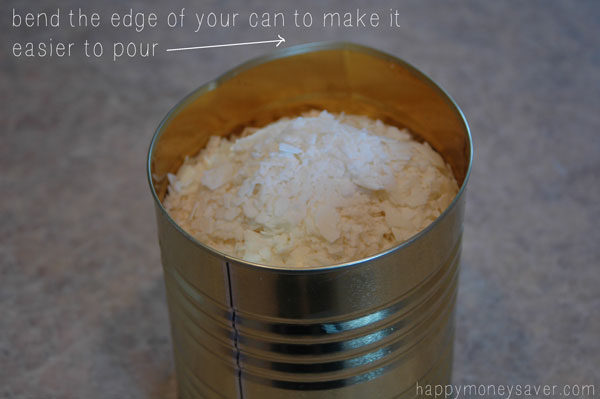
#10 CAN: You can use a double boiler pan if you like, but for ease in cleaning I wanted to use an old #10 can to melt my wax in. I can throw the can away or reuse it again the next time I make candles. If you do use a #10 can, make sure and bend one of the edges so it will be easier to pour the hot wax in the jars.
How To Make 50 Hour Soy Survival Candles
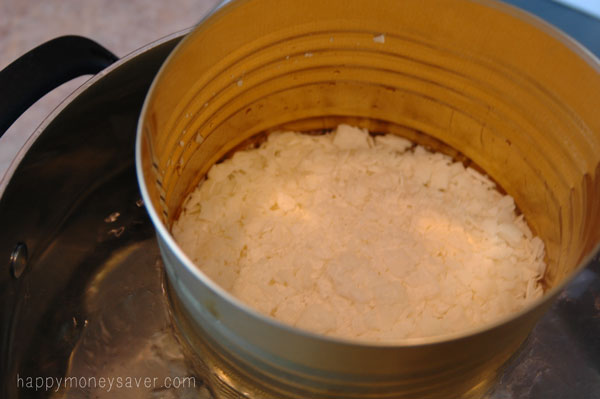
Start a double boiling system by bringing a larger pot of water to boil. Only fill it half-way so when you add your can of wax the water won’t overflow. I filled my number ten can with 2.5 lbs of soy wax flakes.
While the water was heating up, add the wicks to each of your jars. Tip: if you have a hot glue gun add a drop of hot glue on the bottom of the metal part of the wick and stick it straight in the center of the jar. It helps the wick to hold up straighter after you pour the wax.
Once the wax is melted, using hot pads I poured the wax into the jars with wicks.
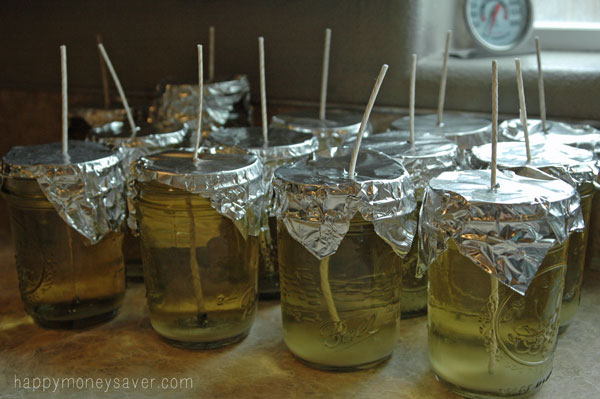
To help hold your wicks straight while it cools poke hole in a little square of aluminum foil, thread the wick through and seal around the jar.
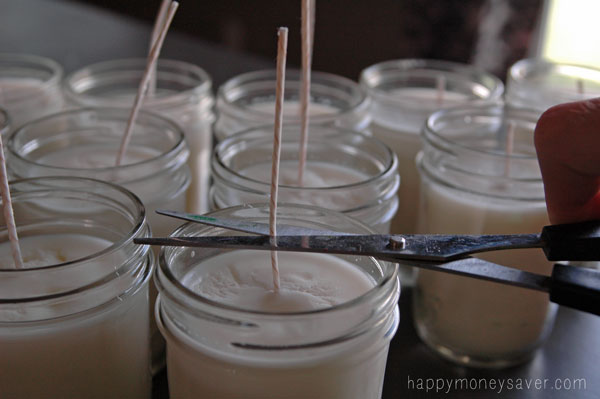
I then melted the other half of the soy wax flakes and poured them into jars as well.
After they all cool, trim the wicks to 1/4 inch. I just set the scissors across the jar so all the wicks would be the same size after being cut.
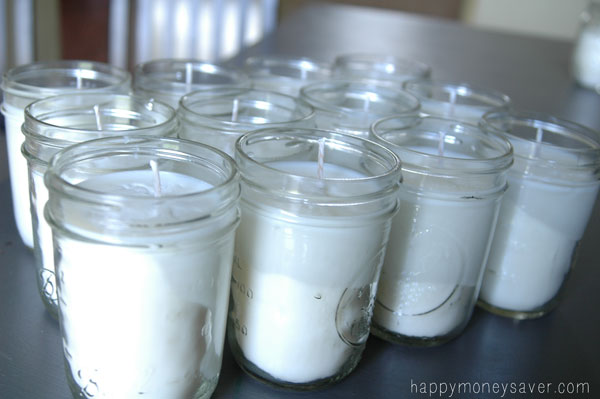
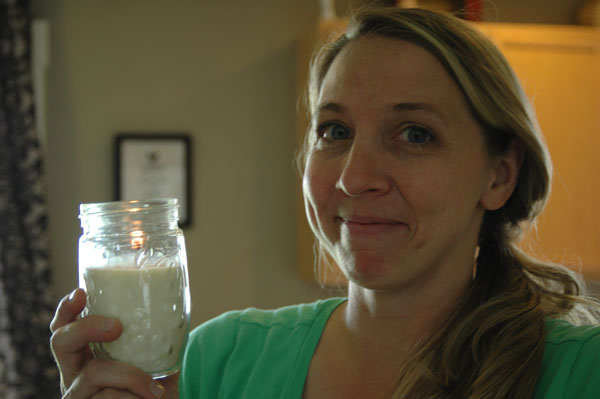
Then enjoy your 50 Hour Soy Survival Candles! Just put the lids on them (adding in a pack of matches) and pack them away until your next power outage or disaster. Then you will have heat as well as light for up to 50 hours each candle.
Note: I did add some essential oils to one of the candles and it smelled lovely. I was thinking that if there was a power outage or disaster it would be better to have non-scented candles so it wouldn’t give me a headache, so keep that in mind. And only use products that are safe to use with melted oil so you don’t get exploding wax or something.
WORTH THE COST? YES – can cost as low as $1.18 per candle, which is an amazing price for Soy candles with a 50 hour burn time.
WORTH THE TIME? Yes, for the amount of money you can save, and how quick and easy it was this is very worth the time.
Price breakdown:
- I paid $12.99 for the 5 lb. bag of Soy wax
- I paid $8.99 for 50 soy wicks ($0.18 each wick = $2.34 for 13 wicks used)
- I had the jars sitting in my garage. If you didn’t you would pay $8-$10 at Walmart or online.
- Note: I was able to fill 13 jars with the 5 lb.s of wax
Final cost for me was $1.18 each candle, but if you needed to purchase the jars it would run you $1.79-$2.00 per jar.
How To Make 50 Hour Soy Survival Candles
Instructions
- Start a double boiling system by bringing a larger pot of water to boil. Only fill it half-way so when you add your can of wax the water won't overflow. I filled my number ten can with 2.5 lbs of soy wax flakes at a time and did this twice.
- While the water was heating up, add the wicks to each of your jars. Tip: if you have a hot glue gun add a drop of hot glue on the bottom of the metal part of the wick and stick it straight in the center of the jar. It helps the wick to hold up straighter after you pour the wax.
- Once the wax is melted, using hot pads I poured the wax into the jars with wicks.To help hold your wicks straight while it cools poke hole in a little square of aluminum foil, thread the wick through and seal around the jar.
- I then melted the other half of the soy wax flakes and poured them into jars as well.
- After they all cool, trim the wicks to 1/4 inch. I just set the scissors across the jar so all the wicks would be the same size after being cut.
Notes
Have you ever made your own homemade candles? Any other tips or tricks you have found to save even more money?


Comments & Reviews
Harper says
BTW folks, ESPECIALLY if you live in cold, power loss areas. You can also use this safe wax to make fire starters. Use muffin liners (paper type) and mix the wax with wood shavings/sawdust to a paste. Ladle into the muffin liners and let cool. Make sure you use a old muffin tin to hold them – NOT the one you use for baking. They will keep forever, and great to start a fire in fireplace/wood stove (non-catalytic). Also great for camping… Put on top of wood and light. Wax will drip down and get on the wood to help it get going. If you dont have sawdust, use tightly rolled cardboard.
Michele Service says
You can also use dryer lint for fire starters; our scouts used paper egg cartons, wax and lint for theirs.
Stacy says
I recently watched a video where they used candles and terracotta pots to heat a room. (Tried it and it worked) I think this would definitely be a good way to make a light/heat kit and still be a fun money saving activity. Thank you
Annastasia says
Can baby food jars be reused for this or would they shatter? We go through 3 a day and i think small scented candles would make cute gifts for christmas after decorating the jars and lids.
Holly says
That is a great Question!!!! I would love to know this! Also, what about other food jars… use and reuse? Perfect timing by the way for me finding your blog article. My family is about to start a business and homemade candles (and hopefully in reused glass containers). Let me know! Thanks!
Happy.MoneySaver says
I haven’t used any myself but from researching online it says that reusing baby food jars are a great storage item for candles. Basically any container that can hold the wax, withstand the heat of the flame and allow the flame to burn will work! Good luck! 🙂
Dana says
I have used baby food jars for candles for years. Since they are “canning” jars, they are tempered
BeesAndChickens says
Okay, so I figured out the real reason I found your site…tallow. I was actually googling about tallow (and read your lye post and it was all downhill from there.) Anyhow, I’m not saying that keeping bees is a walk in the park, but you could be making beeswax candles that burn cleaner and have a much nicer smell. Oh, and the wax if FREE, honey, saving pollinators, preventing allergies, using bee stings as apitherapy……..
Again, muahahahahahaha!
Sincerely,
Shannon
PS Want to to a long distance project together, compare notes, and blog about it? 😉 kidding
Katy says
You have inspired me to go make some. Thanks for the info.
Cathy Heckman says
I’ve been making soy candles for years, you can also melt the wax in the microwave on50% power, I use glass 4 cup measuring cups to melt the wax so super easy to pour. I have also used tea cups to make candles in as well, but buy jars online at jarstore.com as well, shipping is expensive so you gotta watch prices.
Patty says
Just be sure to use a high quality glass measuring cup. I was teaching a class at a friends house and used her glass measuring cup in her microwave… a hole melted in the side of the measuring cup and made a huge mess and then when we took it outside the glass shattered. It was obviously not heat tempered. I had never used anything except Pyrex for this, so it never occurred to me that this might happen!!!
Mandy says
My husband and I prefer to use Olive Oil lamps. We buy the cheapest bulk olive oil we can find. The olive oil doesn’t have to be extra-virgin or cold pressed (since you aren’t eating it), so you can find it very cheap. We get ours at Sams or Costco. The oil burns very slowly, so it also lasts quite a long time. It burns very clean. My favorite part is the safety angle. Unlike a regular candle, if the olive oil lamp is knocked over the oil actually puts the fire out. You can purchase the booklet for under $4 at Lehmans that teaches you all about it. https://www.lehmans.com/p-1422-i-didn-t-know-that-olive-oil-would-burn-booklet.aspx I recommend only buying 1 of the olive oil burning jars from Lehmans, just to see how it is made. They are so simple-that you can easily craft your own. I am curious to try the soy candles still. I’m so glad you shared.
Pam says
Hello, found your site while I was surfing and glad I did. You’ve got a lot of neat ideas in here.
Have you ever used any of those Smoke Eater candles they eliminate the smell of smoke. Well really any odors you want to get rid of for that matter. I was wondering if you have any idea how one can make their own. I think they are a tad expensive in the stores.
Hey email with your ideas. Any feed back would be greatly appreciated.
pam
Dave says
Be wary of tin cans as some types of solder is very low temperature. As long as the tin can is always used in the double boiler fashion it probably won’t come apart, but…
Back when I was a child we made paraffin candles and sold them. A modification of one of the comments and what I remember from my childhood would be to make the candles the regular way, but in the Silicon Muffin Tins and then when they are basically hard, you heat a second batch of wax in a saucepan and add coloring or not, and you beat it carefully with a manual egg beater.
It will foam up and you use a spatula (kitchen knife) to cover the candles.
Lindsey says
Be careful. Just because the jars are made to withstand heat doesn’t mean that they can withstand uneven heat. Use clothes pins instead of aluminum foil to keep your wicks straight and centered. I see a few candles where the wick isn’t centered properly… That’s when you get uneven glass heating and exploding glass candles. If you want to add scents/colorants, buy stuff made specifically for candles. Most things (even oil burner fragrance) will spark and/or clog your wick. While it might be warm and well lit when your house burns down, it’s best not to. 😉
Michele Service says
Thanks for the clothespin idea to hold the wicks upright and centered. After reading the instructions, my first thought was that putting aluminum foil over the heated wax may not be a good idea (condensation from the heat = water droplets on top of the wax?).
Wendy CF says
I’m thinking I’ll use soup cans, and I like the idea of putting a packet of matches with it, so I’ll just tape a packet on the outside of the can. They won’t shatter, and you can reuse them over and over.
Chris P says
Do you think I could use the Dollar Tree’s Mason Jars with handles that they use as drinking glasses as candle holders like the jars you did?
naomi says
I would not recommend using the jars from dollar tree. I bought 2 at Christmas time and pored coffee in them one cracked across the bottom. The other one shattered in pieces. Glass and hot coffee went everywhere. I ended up burning my hand and had glass shards on my kitchen floor. The jars are made to look like canning jars but do not hold up.
Karrie says
Good to know! Thanks for sharing Naomi!
Michele Service says
Thanks, Naomi. I agree that Dollar Store items would not be the type to use. So sorry that you were hurt. Praying that you have healed completely. 🙂
Sarah Shunk says
I did something like this for my wedding this past June. My mom had lots of candle holders so we cleaned them up, melted the wax block my grandparents gave me years ago, and started making the candles. My grandma had even gave me the stubs from the beeswax candles the church used to use. I had ordered the wick and wick holders from a craft store with a coupon, so things were a little cheaper. The candles worked great and we saved lots of money by not having to purchase candles for the reception.
Sherri@ The Well Floured Kitchen says
Thanks for the detailed tutorial! I love the tip about bending the can, so smart. I was wondering how much essential oil to use?
Alise says
Has anyone tried it with pint jars? Would they burn for twice as long as half pint jars?
Outlander says
Hi, I was just wondering how do you know that these are 50-hour burning candles? I mean, is it because soy wax burns that long, or because of a wick you use, or you just tested it and thats how long that size jar burns, or what…? Thank you!
Karrie says
I tested it out. I let it burn until it was used up and it burned for 50 hours.
Ashley says
Prior question if you can find time. I thought maybe it got lost in the many msgs. Hi, for the life of me I can’t figure out, why my candles are sunken in after they have hardened. Any idea why? Thanks appreciate it
Karrie says
Hmmm…I am not sure! Was there an air bubble maybe that made it sink? Mine didn’t do that so I am not sure.
bobbi says
depending on the brand of soy wax you are using you may have to do a second pour. I use the 646 which has eliminated this step. Air bubbles are due to pouring to fast and not heating it up to temperature before pouring. The one I use has to be heated up to 180 degrees F and then cooled down to 130 before being poured or it will cause them to cave in and have air bubbles. Over stirring will also cause air bubbles. unless you are adding scents or color there really isn’t any reason to even stir the wax. If you are using the type that requires the second pour, only fill the container 2/3 of what you plan on putting in, let it harden then take a knitting needle or something similar and poke holes around the wick. Then heat the wax up a 2nd time only this time going 20 degrees hotter than the first time and then pour. this allows the new wax to melt into the already hardened wax and not leave a tell tale line of the second pour. A lot of these types of questions can be answered at candle science. http://www.candlescience.com
Patty says
I’ve found that if the candle is in a cool place and/or cools too quickly, it will get that sunken effect.
Libby says
Wax tends to expand slightly when heated, like metal and water, etc. It usually has a little dip in the center after cooling. I just reserve a little of the wax, then reheat and pour it to fill the centers of my home made candles. Some wax expands more than others, so it depends on the mix you use, too.Filling the depression will keep your wick from burning too low, which melts the wax and can put the flame out, or cause smoking. It also makes it harder to light the second time, as the higher the wall, the more melted wax hardens to cover the wick.Using a wick too narrow for the width of wax can also cause the same problem.
Ashley says
Hi, for the life of me I can’t figure out, why my candles are sunken in after they have hardened. Any idea why?
Michele Service says
As the wax hardens it tends to sink in…it is normal. You can always go back and dribble in additional wax to fill the indentation before trimming your wicks and storing your candles. (This happens with paraffin that is poured over jelly/jam when canning, too.)
Wendy says
I make candles with beef tallow. For wicks I just use cotton string, which I dip into the tallow a few times before pouring, and allow to harden. I use a silicone muffin tray as a mold, and then pop the candles out afterward- no jar required.
Patty says
How long do they burn and does the tallow liquify completely and keep burning (like an oil lamp), or does it liquify a little at a time and mostly stay solid like a candle?
Sophia Lee says
I found these half-pint/9 oz quilted mason jars on Amazon, 12 for $10. 🙂
http://www.amazon.com/gp/product/B008586UJY/ref=as_li_ss_tl?ie=UTF8&camp=1789&creative=390957&creativeASIN=B008586UJY&linkCode=as2&tag=fistofcoup-20
Christie says
This nut case with the jars was on craiglist in Oregon, so be careful when looking. ; )
Christie